
I recently blogged about the fear of making a cheesecake – flashbacks of a sticky, dripping mess filled me with dread but this and many other baking fails forced me to make a list of all the cakes and bakes I wanted to perfect. I started with the cheesecake, then the cookie and soon will be dough as I really need to stop going to a cafe in town every Saturday purely for their cinnamon buns.
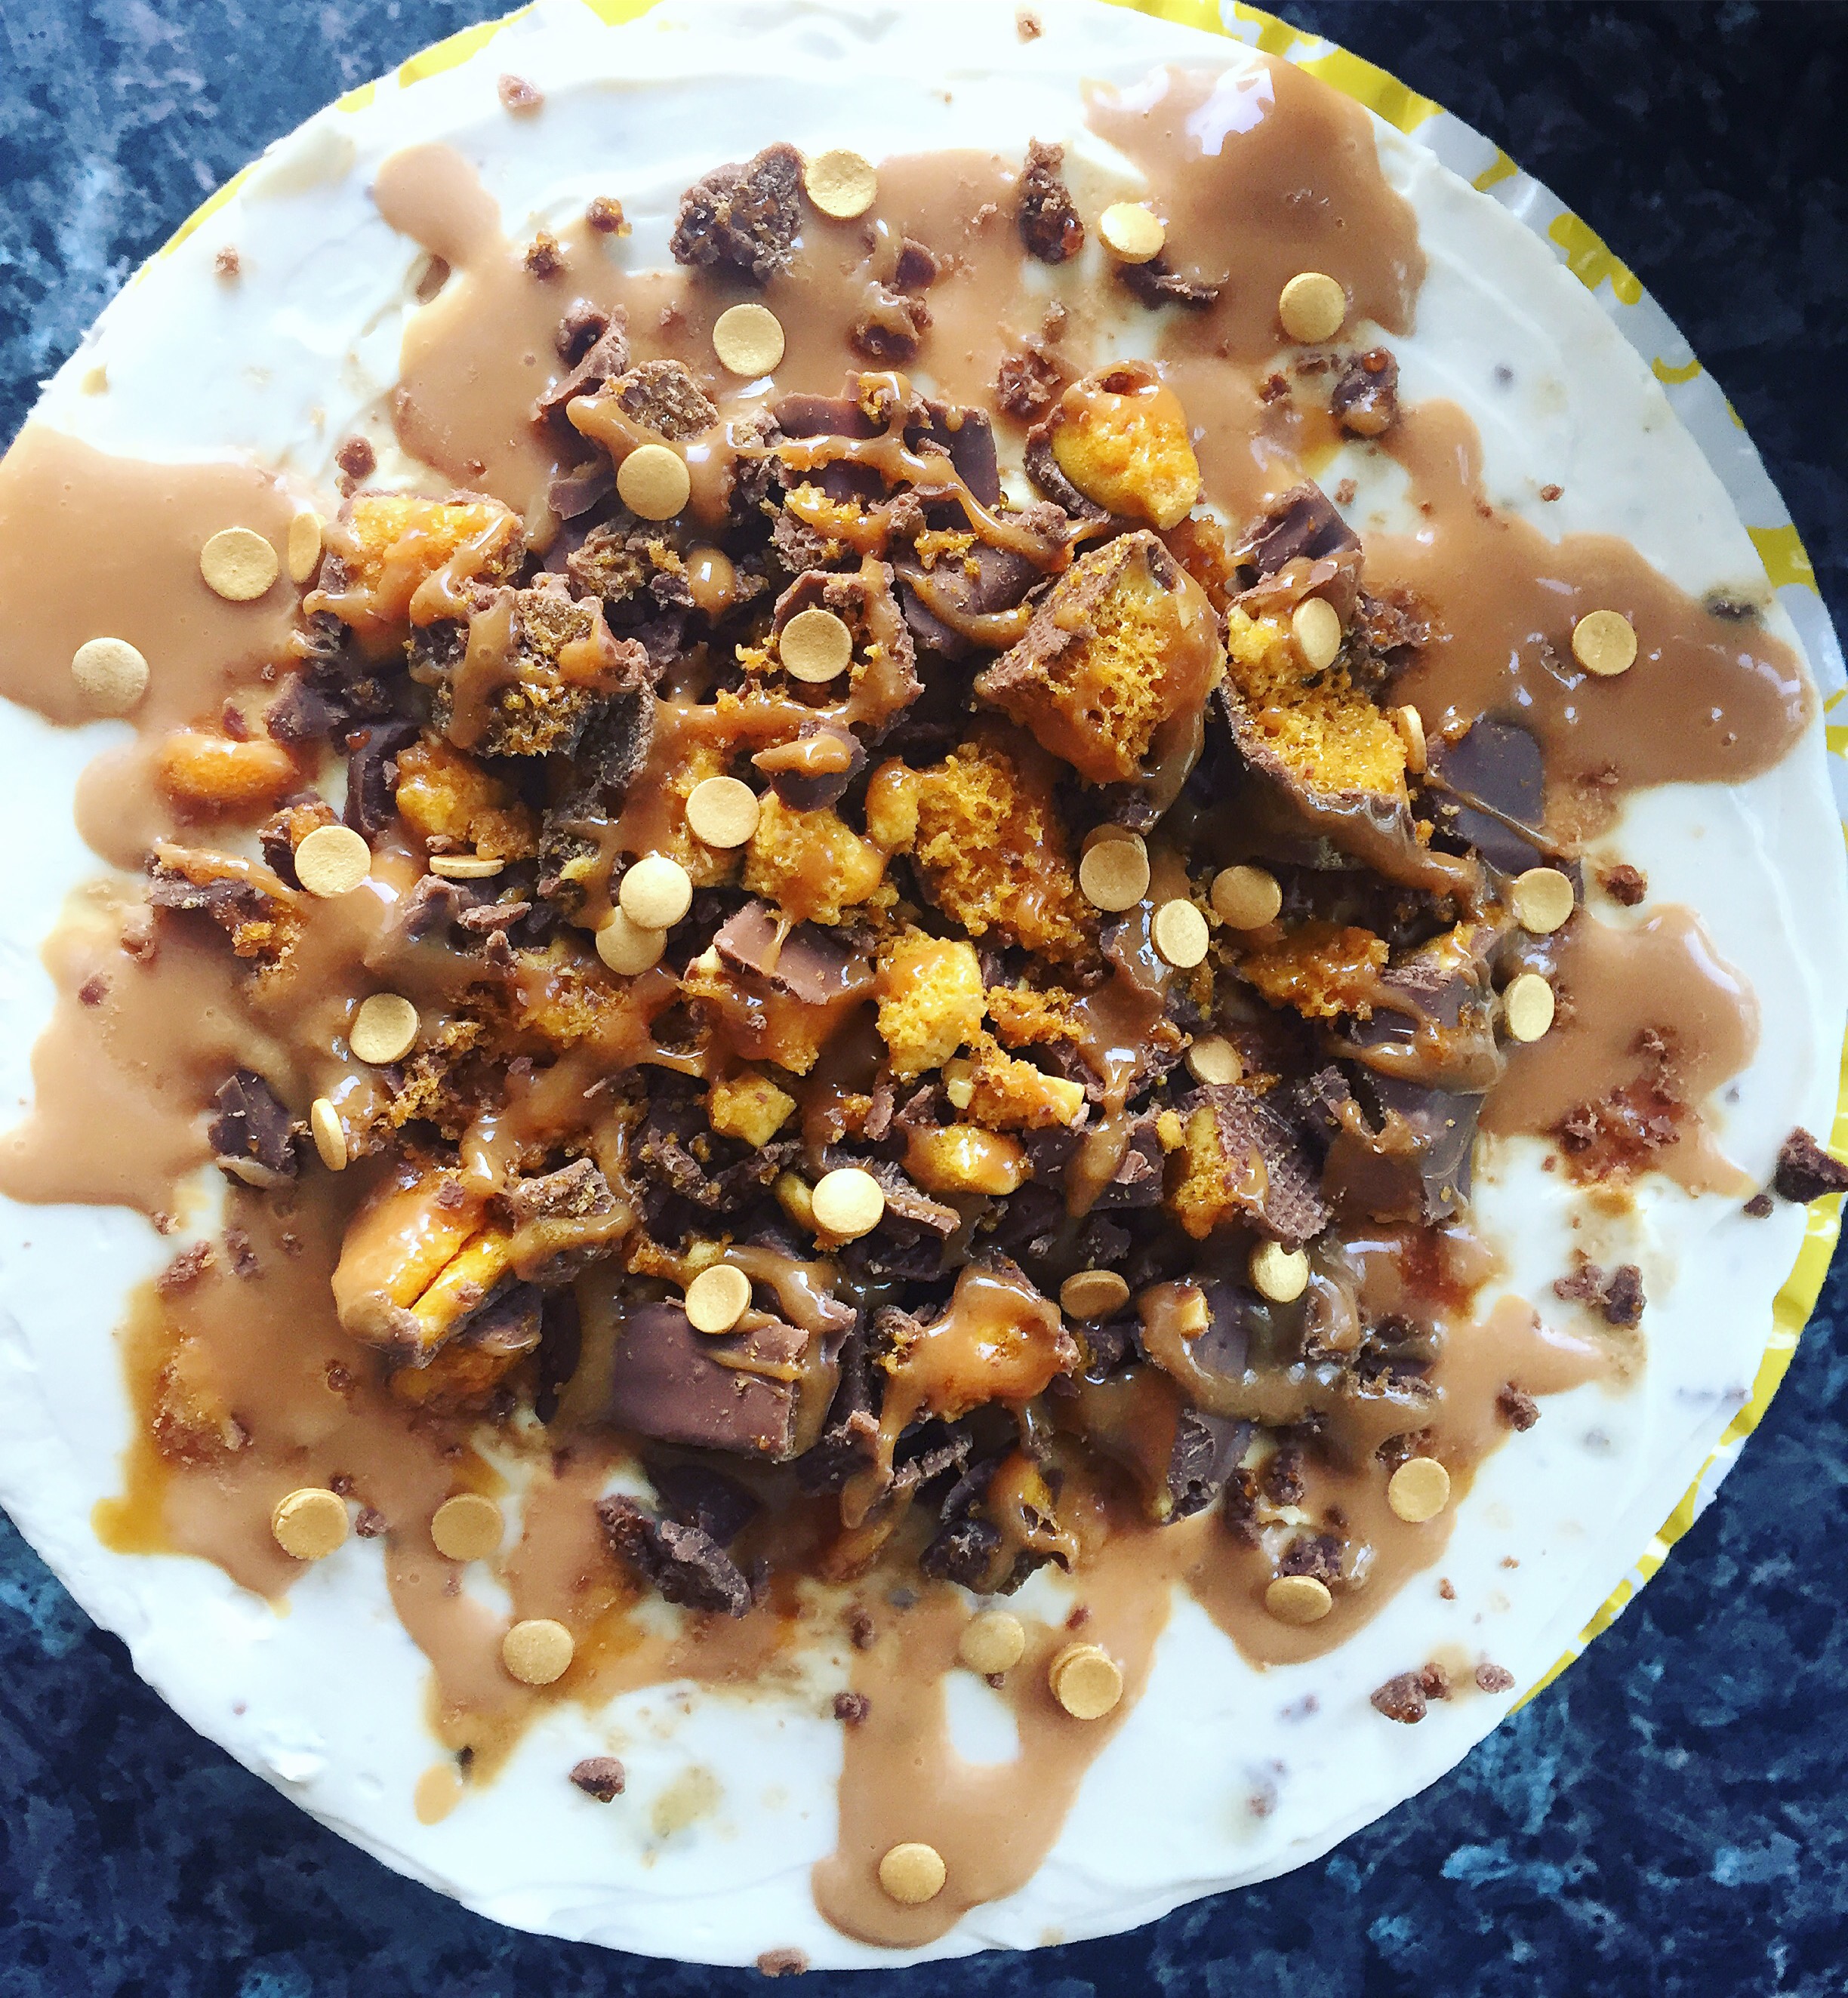
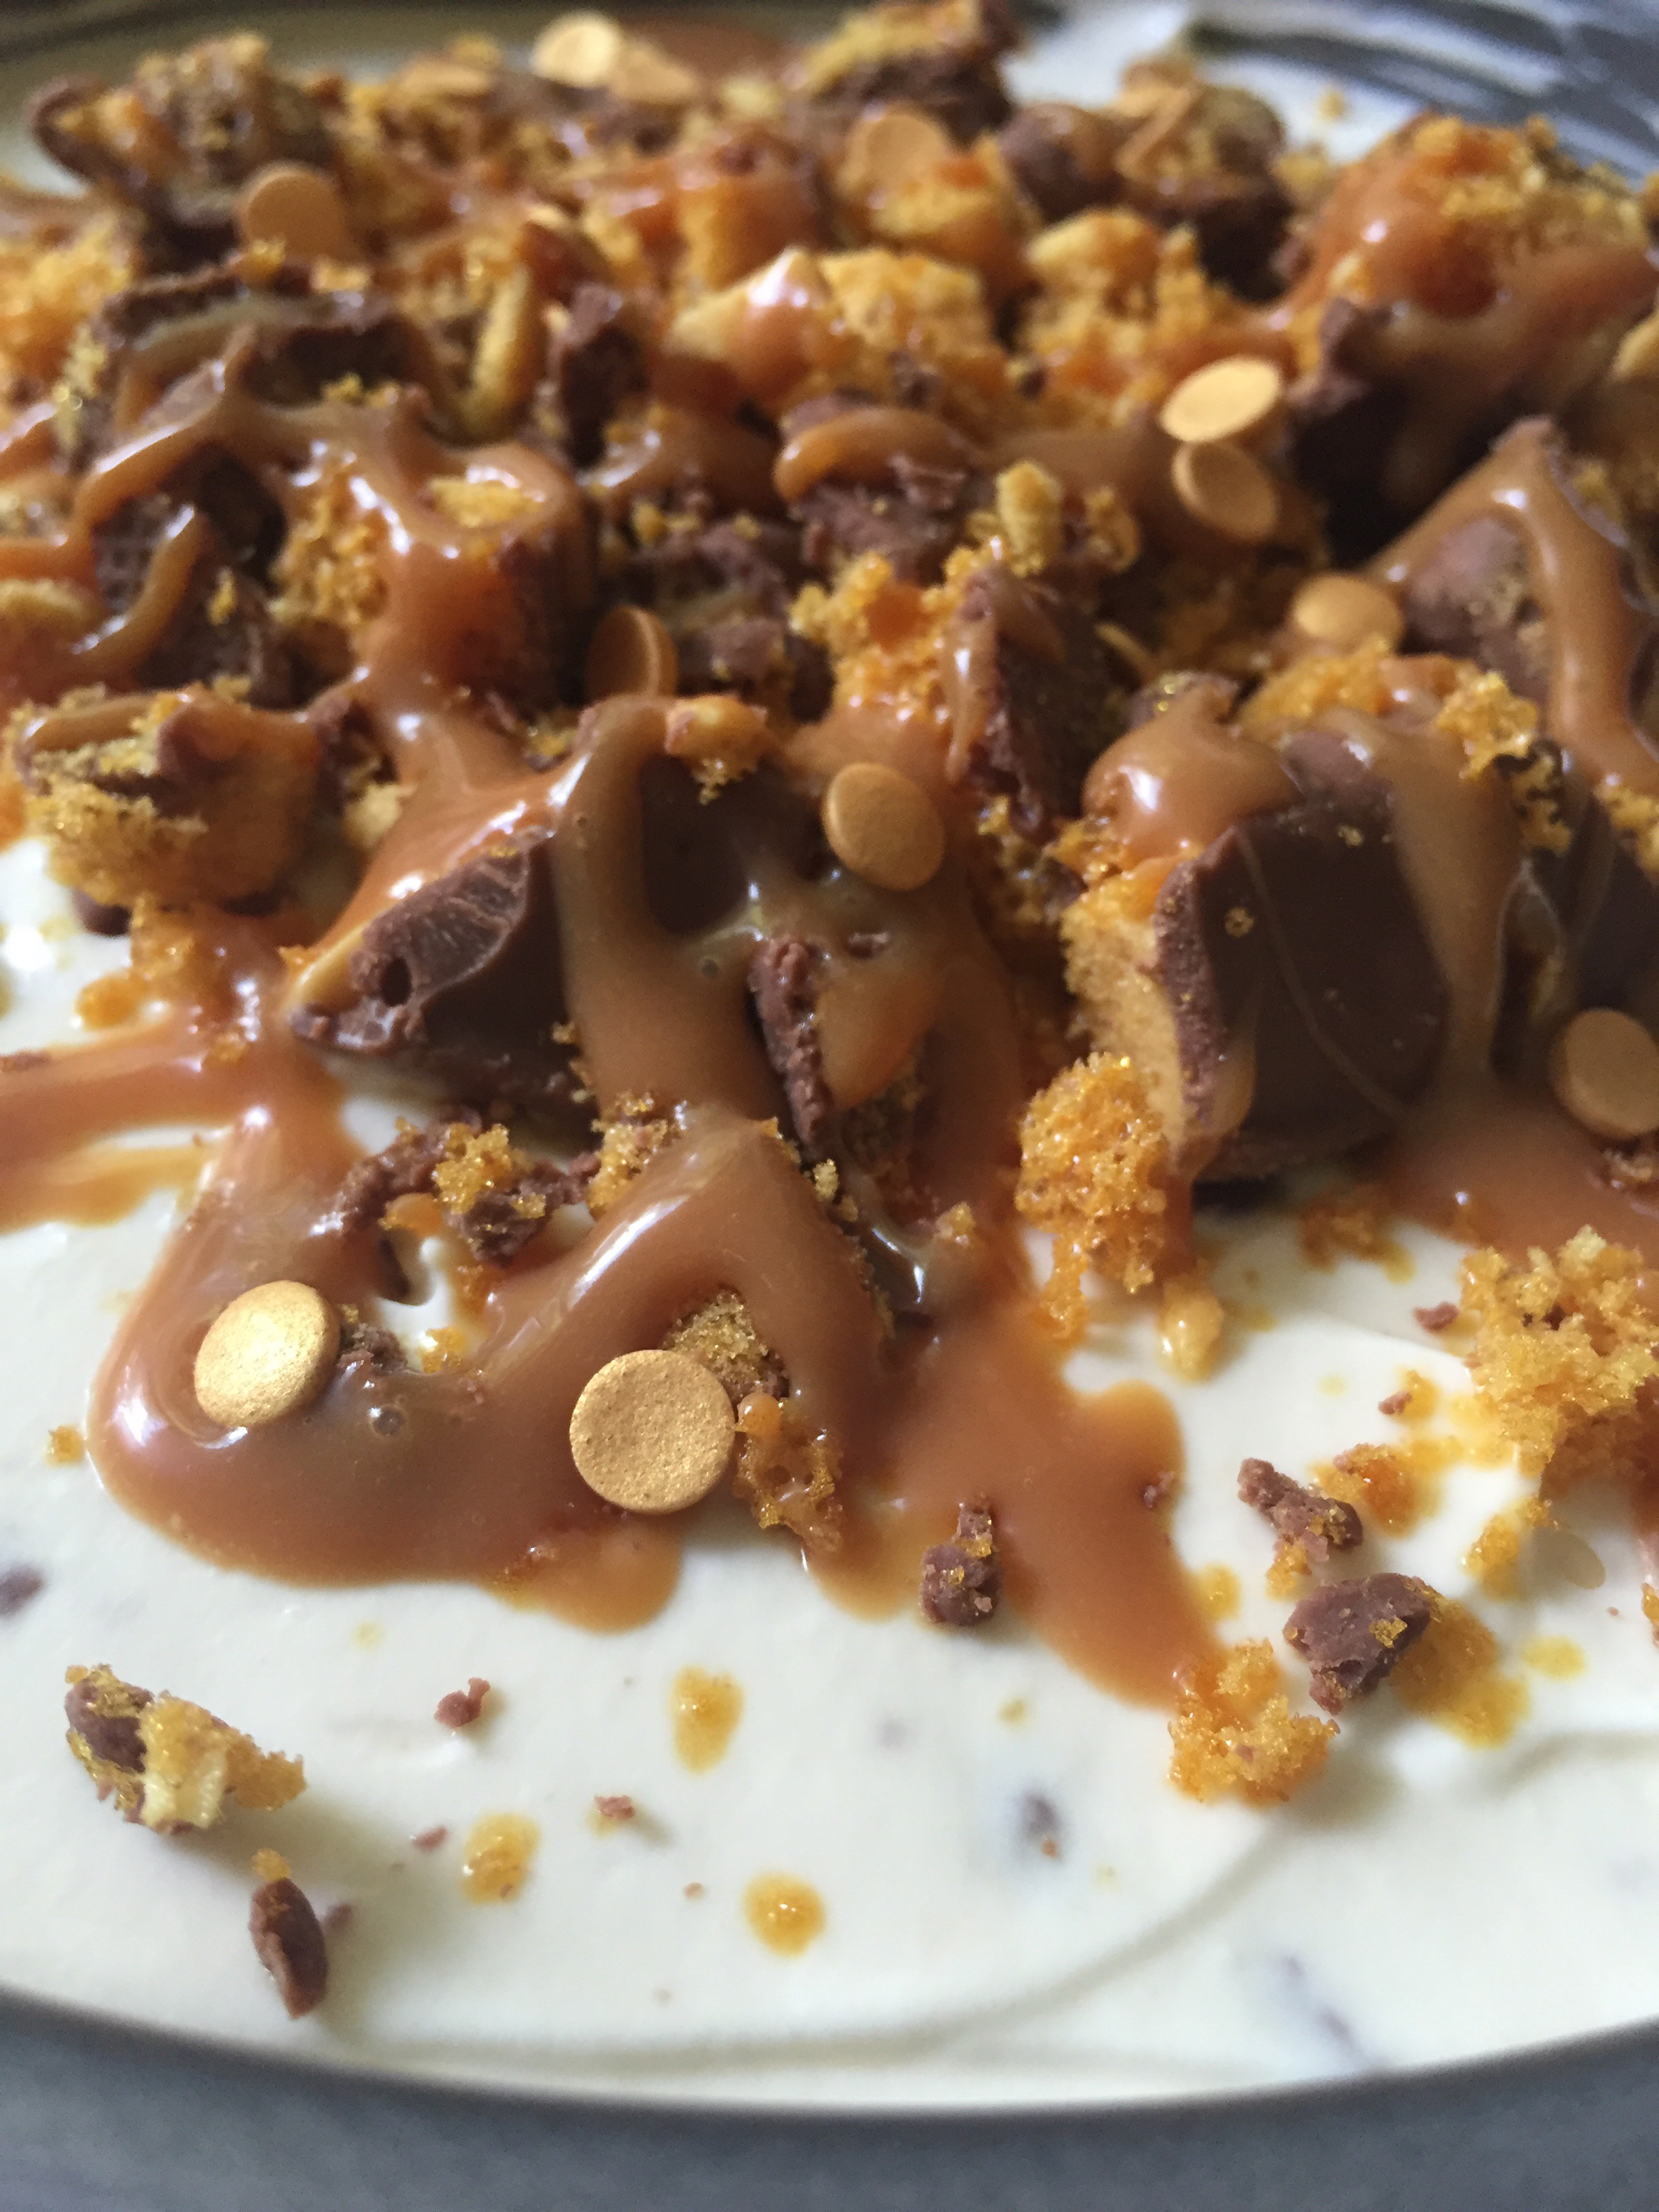
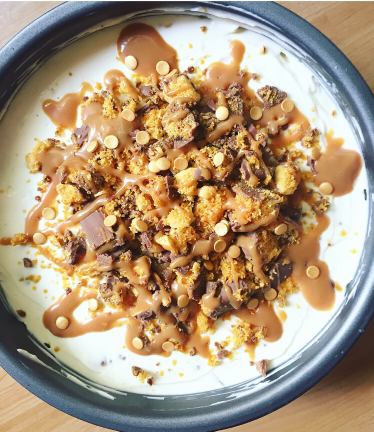
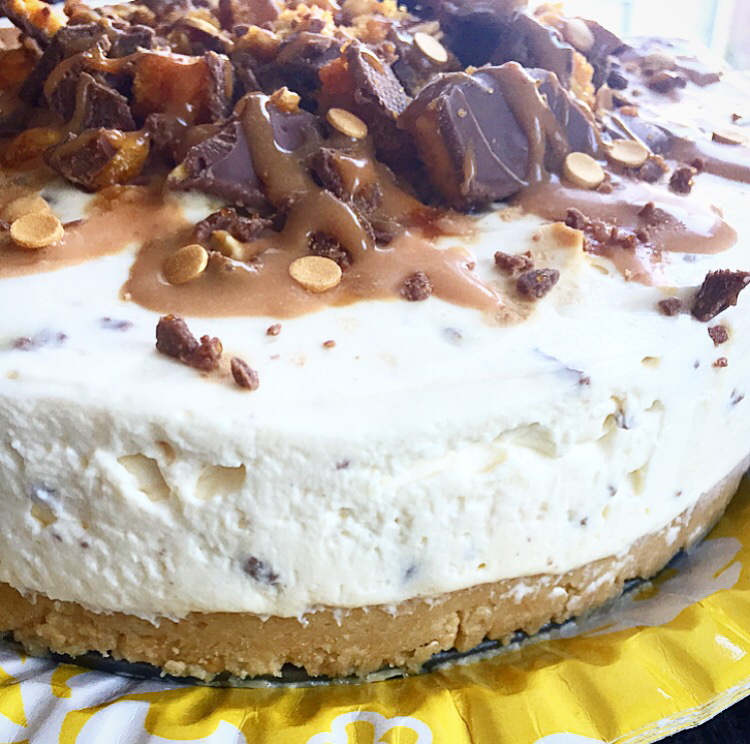
I absolutely love cheesecake and its the only ‘cake’ my Dad will eat, it also happens to be my boyfriend’s favourite too and as I’m 18 months into writing this baking blog (which he reads) I’m not sure how much longer I could put off making them both one. The below is a honeycomb dream, it has honeycomb sprinkled within the cheesecake filling as well as being towered on top (sadly its not home-made honeycomb, that too is on my list) and to make it even better, it is served on a sweet Golden Oreo base and drizzled in caramel.
You can make both the honeycomb and caramel yourself, I have a recipe for caramel here but the below recipe uses ready-made ingredients making it a really easy dessert you can throw together if you’ve forgotten someone’s birthday or a dinner party.
Ingredients (makes one cheesecake, 23cm wide. Will serve 10-12):
- 275g Golden Oreo biscuits, crushed
- 90g unsalted butter, melted
- 500g full fat cream cheese
- 300ml double cream
- 80g icing sugar
- 1 tsp good quality Vanilla extract
- 2 x 32g bars of Crunchie, crushed
Topping:
- 2 x 32g bars of Crunchie, crushed into small chunks
- 1 x 397g Carnation Caramel
- Gold sprinkles (optional)
Method:
- Take your finely crushed biscuits and mix with the melted butter until both begin to stick together. Pour into a loose bottomed, 23cm wide tin and spread evenly across the bottom, flattening with the back of a metal spoon – you need a strong, smooth base which will hold in place (did I just rhyme?)
- Once you have your base with no cracks or holes, place in the fridge for up to an hour so it can ‘set’
- Once the base has set, whip the double cream (use a hand or electric whisk to do this, I prefer the latter because my hands are weak and ache when doing by hand plus it takes a lot longer) until it has thickened considerably and you have soft peaks. Set aside and in a separate bowl, add the cream cheese, icing sugar and vanilla together and whisk with an electric whisk for about 30 seconds (so all the ingredients has combined). It may be slightly runny but don’t worry, this will change when you add the whipped cream
- Add the whipped cream to your cream cheese mixture and whisk briefly again until all has combined, then add in the crushed Crunchie bars and mix by hand until you have a thick, creamy cheesecake filling
- Spread on top of the biscuit base, smoothing with a palette knife and place back in the fridge to fully set overnight. This is ideal, if not possible then a minimum of 4-6 hours
- Once removed from the fridge and fully set, remove from the tin and decorate with the crushed Crunchie bars and drizzled caramel just before serving. The cheesecake will keep for around 3 days after making
Enjoy! Nic x
Like this recipe? Why not check out my Bourbon, Cookie Dough or Oreo Cheesecakes and don’t forget to follow me on Instagram and Twitter.

As always, this looks a treat! Crunchie, Caramel, Oreos, this honeycomb looks really sweet and tasty to eat!
LikeLiked by 1 person
Aww thank you!
LikeLiked by 1 person
Reblogged this on Recipe Dreams and commented:
Fear no more! This looks awesome!
LikeLike
Sounds amazing.
LikeLiked by 1 person
Thanks Joshua!
LikeLike
This looks delicious! Can verify that making honeycomb can be a bit of a pain- the time between nice tasting honeycomb and burnt honeycomb is literally seconds (and I ended up with the latter!) still need to work on that!
LikeLike
I follow you on Instagram and had to come check out this recipe. It looks AMAZING and I love the Golden Oreo crust idea! Thank you for posting 🙂
LikeLiked by 1 person
Aww thank you my lovely! And thanks for the insta love, your Gratin potatoes that you posted earlier have given me some dinner inspo 😊 x
LikeLike